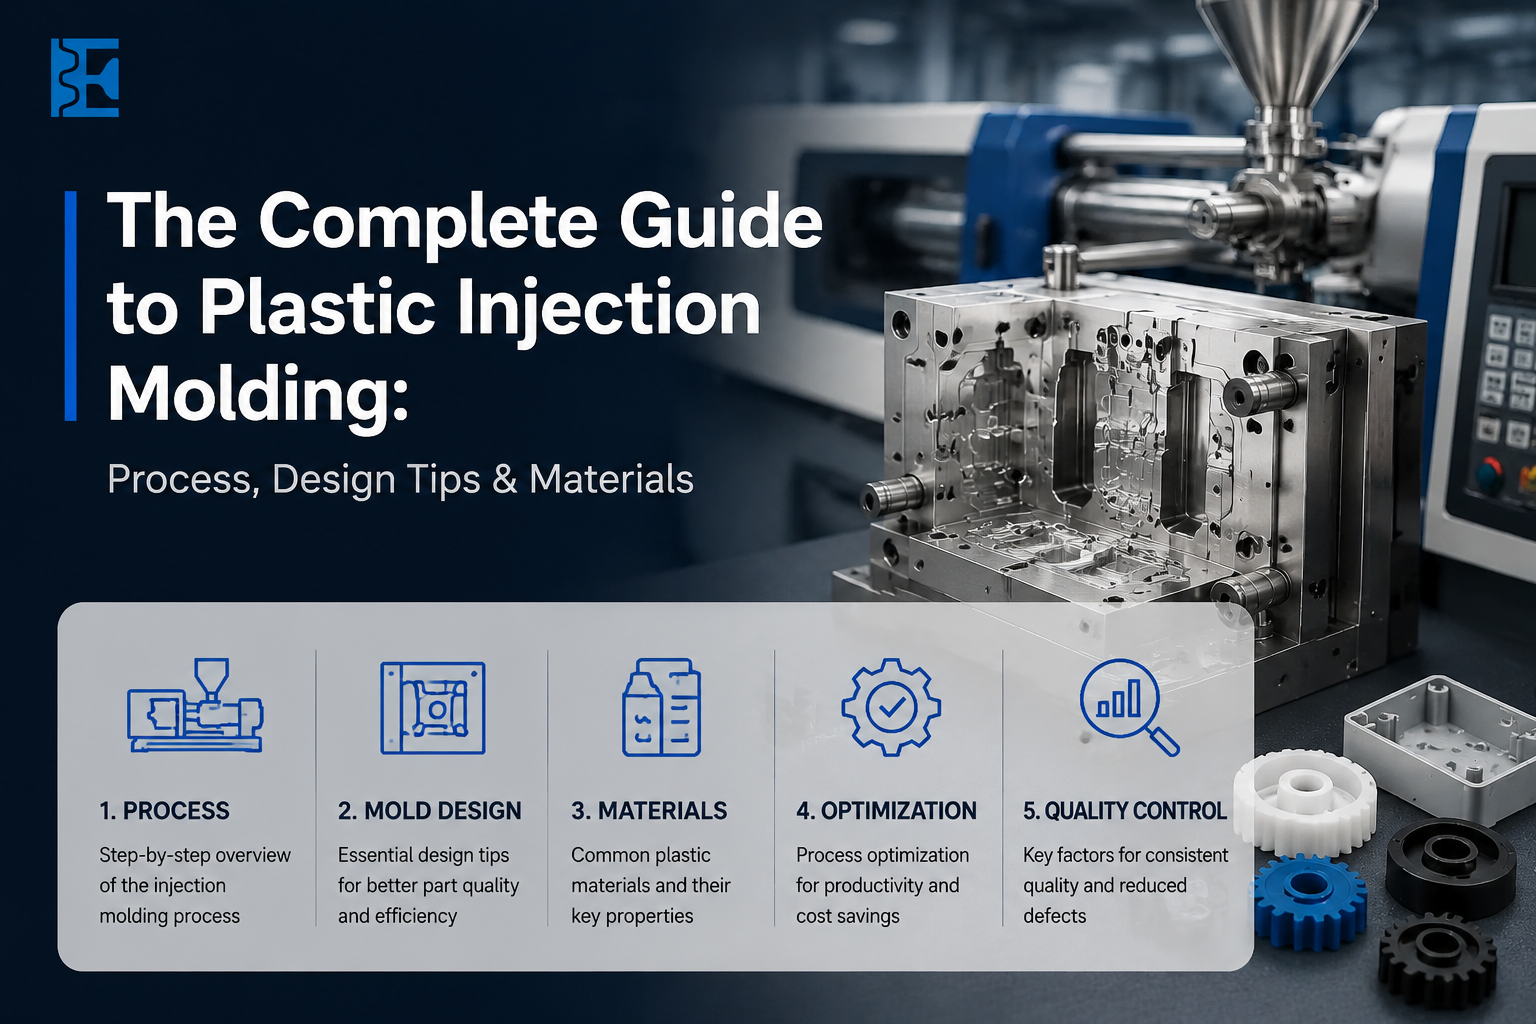
Injection molding is the process behind most of the plastic parts you touch every day — phone housings, automotive clips, medical device enclosures, robotics covers. It dominates high-volume plastic manufacturing because a single mold can reproduce the same part thousands or millions of times with tight, repeatable accuracy.
Shenzhen Elite Technology Co., Ltd (Elite Mold Tech) has spent 20+ years building injection molds and molding plastic parts for customers in aerospace, automotive, medical devices, robotics, consumer electronics, and industrial equipment. This guide covers what the process is, how it works, how to design a part that molds correctly the first time, which material and finish to choose, what things typically go wrong, and what it costs — the same checklist our engineers run through on every quote.
What’s in This Guide
- What Is Plastic Injection Molding?
- How Does the Injection Molding Process Work?
- أنواع القولبة بالحقن
- Design Guidelines for Injection Molded Parts
- Designing Complex Features
- Common Defects and How to Fix Them
- Injection Molding Materials
- تشطيبات السطح
- Tolerances and Precision
- Post-Processing and Secondary Operations
- Quality Control and Certifications
- Injection Molding Cost Factors
- Glossary
- الأسئلة الشائعة
What Is Plastic Injection Molding?
Plastic injection molding is a manufacturing process in which plastic resin is melted, injected under pressure into a precision-machined steel or aluminum mold cavity, cooled until it solidifies, and then ejected as a finished part. Because the mold defines the part’s exact geometry, each cycle produces a nearly identical result — which is why the process is the standard choice for producing plastic parts at volume.
The trade-off is upfront investment: a mold has to be designed and cut before a single part exists, so tooling cost and lead time come first. Once the mold is built, though, the cost of each additional part drops sharply. That’s why injection molding fits best for production runs, bridge tooling between prototype and full-scale manufacturing, and end-use plastic components — rather than one-off parts, which are usually better suited to CNC machining or 3D printing.
At Elite Mold Tech, we support the full range: prototype-molded samples for design validation, bridge tooling for early production, and multi-cavity production molds for high-volume orders.
How Does the Injection Molding Process Work?
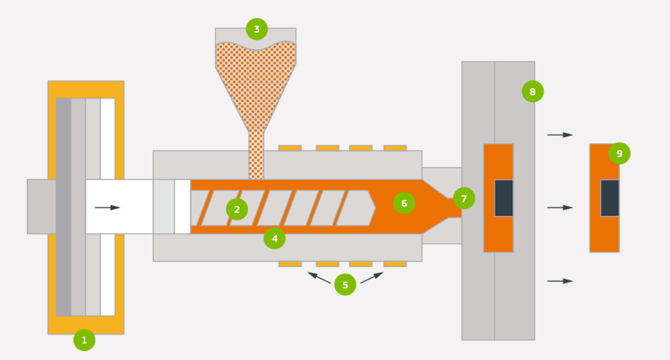
An injection molding machine has three core components: a hopper that feeds raw plastic pellets in, a heated barrel with a rotating screw that melts and pushes the resin forward, and the mold — held in a clamping unit — that shapes and cools the part.
Every production cycle runs through the same sequence:
- Clamp — the two halves of the mold close and lock under pressure.
- Inject — molten resin is forced into the mold cavity through the gate and runner system.
- Pack and hold — additional pressure is held briefly to compensate for material shrinkage as it begins to cool.
- Cool — the part solidifies inside the cavity; cooling channels in the mold pull heat out evenly.
- Eject — the mold opens and ejector pins push the finished part free.
A single cycle can run anywhere from a few seconds to about a minute, depending on part size, wall thickness, and material — and it repeats continuously for the length of the production order. Because so much of the final part’s accuracy and cosmetic quality depends on how well this cycle is controlled, we treat process parameters (injection speed, pressure, cooling time, mold temperature) as part of the engineering, not an afterthought — documenting them so every production run reproduces the same result as the first approved sample.
أنواع القولبة بالحقن
Different parts call for different molding approaches. Here’s how we match process to project:
| العملية | الأفضل لـ | Key Design Consideration |
| قولبة حقن البلاستيك | Standard thermoplastic parts, prototype through production | Material selection, wall thickness, and draft drive moldability |
| Prototype Molding | Low-volume runs for design validation before full tooling | Faster, lower-cost tooling; often simplified cooling |
| صب القوالب الإنتاجية | Higher-volume orders | Multi-cavity tooling and cycle-time optimization lower per-part cost |
| قولبة الحقن بالحقن السريع الدوران | Tight-deadline projects | Streamlined tooling workflow to compress lead time |
| التشكيل الزائد | Rigid substrate + soft-touch or sealing layer | Bonding compatibility between substrate and overmold resin |
| إدراج القوالب | Parts needing embedded metal threads, pins, or contacts | Insert placement and retention locked in before tooling |
| القوالب الدقيقة | Small, high-precision components | Tight tolerances, specialized miniature tooling |
| LSR Molding | Seals, gaskets, soft medical components | Different flow, cure, and release behavior than thermoplastics |
| Family / Multi-Cavity Molding | Multiple parts or multiple copies in one tool | Balancing flow and cooling across cavities |
Design Guidelines for Injection Molded Parts
Most cost overruns and quality problems in injection molding trace back to decisions made before the mold is ever cut. These are the checks our team runs on every design review.
- Wall thickness — Keep walls as uniform as possible. Uneven thickness cools at uneven rates, which is the leading cause of sink marks, warping, and voids. Where thickness must change, taper the transition gradually instead of stepping it abruptly.
- Draft angle — Vertical walls need a slight taper — typically starting around 1-2 degrees — so the part releases cleanly from the mold instead of dragging or scuffing. Textured surfaces need more draft than a polished one to release properly.
- Ribs and gussets — Ribs add stiffness without the sink risk that comes from thickening an entire wall. As a general guideline, keep rib thickness around 50-60% of the adjacent wall to avoid a visible sink mark on the opposite face.
- Bosses — Bosses should be cored out (hollow) rather than molded solid. A solid boss almost always telegraphs as a sink mark on the finished surface.
- Gate location — Where resin enters the cavity affects fill pattern, weld line placement, and where the small gate mark ends up on the finished part. Relocating a gate after tooling is cut is expensive.
- Corners and fillets — Sharp internal corners concentrate stress and can crack under load. Rounding internal corners with a fillet improves both moldability and part strength.
- Undercuts and ejection — Features that can’t be pulled straight out along the mold’s opening direction need a side-action, lifter, or a design change.
- Realistic tolerances — Resin shrinks as it cools, and different resins shrink by different amounts. We only recommend tight tolerances where the part’s function actually requires them.
For complex or cosmetically critical parts, our engineers can run mold flow analysis before cutting steel, which surfaces fill, weld-line, and cooling issues while they’re still inexpensive to correct on paper.
Designing Complex Features
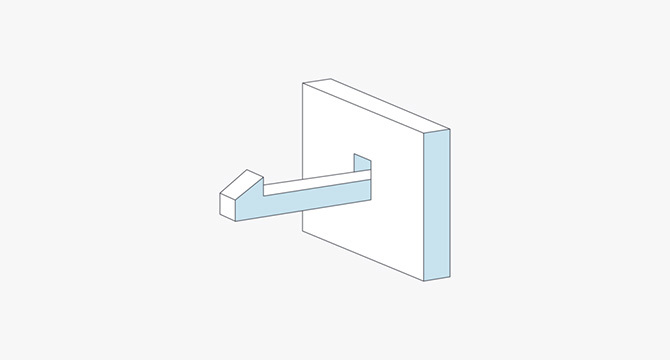
Snap Fits and Clips
Snap fits reduce the need for screws and secondary hardware, but they add repeated flex stress to the design, so material choice matters — a flexible resin tolerates a snap feature far better than a stiff or brittle one. Depending on geometry, the mold may need a side-action or lifter to release the feature cleanly.
Living Hinges
A living hinge is a thin, flexible strip of plastic connecting two molded sections so they can flex repeatedly without breaking. Polypropylene is the most common material choice because of its fatigue resistance. Keep the hinge section thin, uniform, and free of sharp transitions.
Bosses and Standoffs
Beyond keeping bosses cored out, support them with ribs or gussets where extra strength is needed, and keep surrounding wall thickness consistent to minimize sink and voids.
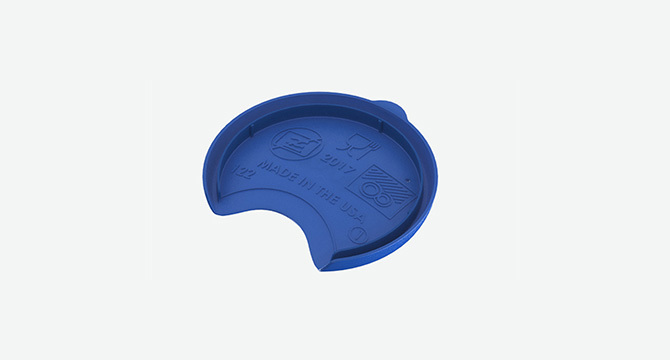
Molded Text and Logos
Text molded directly into a part needs to be large enough to machine into the tool and release cleanly. Simple sans-serif fonts mill more reliably than decorative ones. As a starting point, keep text at least 20pt, with stroke width and depth sized to the part’s material and finish.
ما هو القولبة المفرطة؟
With over molding, the production of the substrate parts is a standard injection molding process involving an aluminum mold with no heating or cooling lines running through it. Cycle times are a bit longer, which allows our molders to monitor fill pressure, cosmetic concerns, and the basic quality of the parts. When the total run of substrate parts are molded, over mold tooling is then assembled to the press. The substrate parts are placed by hand into mold where each part is over molded with either a thermoplastic or liquid silicone rubber material.
Over molding and Insert Molding
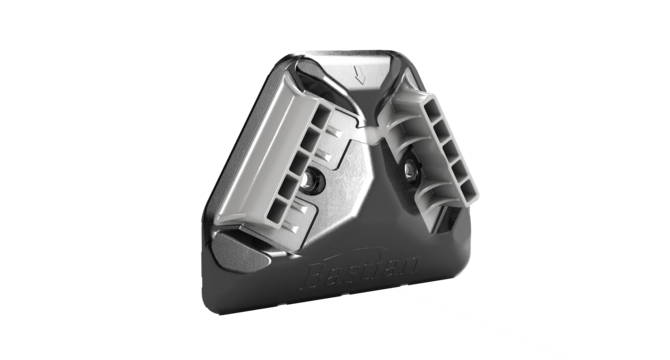
Combining materials or embedding components adds function but depends on compatibility — bonding between substrate and over mold resin, or secure retention of an insert under molding pressure.
Common Injection Molding Defects and How to Fix Them
| Defect | What It Looks Like | Common Design Cause | Design or Process Fix |
| علامات الحوض | Shallow depressions on the surface | Thick walls, solid bosses, heavy ribs | Core out mass; redesign ribs to spec thickness |
| الالتواء | Twisted, bowed, or uneven part | Uneven wall thickness, unbalanced cooling | Uniform walls; balanced cooling channel layout |
| Voids | Trapped air pockets inside the part | Thick, slow-cooling sections | Reduce section thickness; adjust pack pressure |
| فلاش | Thin excess plastic at the parting line | Worn or misaligned mold shutoffs | Tooling maintenance; tighter shutoff design |
| Short shots | Incomplete cavity fill | Thin walls, long flow paths, poor gating | Adjust gate location; revisit wall thickness |
| Weld lines | Visible or weak seam where flow fronts meet | Multiple gates, flow around obstacles | Reposition gates; adjust process parameters |
| Jetting | Wavy, worm-like surface marks | Resin entering too fast into open space | Adjust gate location or injection speed |
| Burn marks | Dark or charred spots, often near gates | Trapped air, excess shear heat | Improve venting; adjust injection speed |
Catching these on paper — or in a mold flow simulation — is always cheaper than catching them after steel has been cut, which is why design review happens before we quote tooling.
Injection Molding Materials
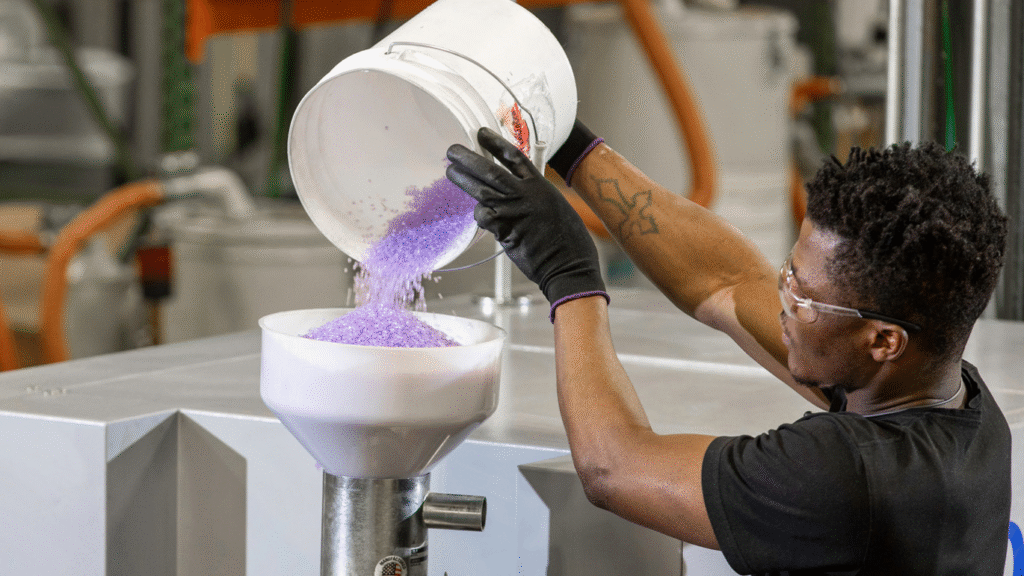
Material selection depends on what the part has to do in service: how much load it carries, what temperature or chemical exposure it faces, whether it needs to flex, and what it needs to look like.
| Resin Family | Common Examples | الاستخدام النموذجي | Design Notes |
| Commodity thermoplastics | PP, PE, PS | Cost-sensitive housings, containers | Lowest cost; moderate performance |
| Engineering thermoplastics | ABS, PC, Nylon, POM, PBT | Functional housings, gears, clips, structural parts | Better strength, stiffness, heat resistance |
| High-performance thermoplastics | PEEK, PEI, PPS | High heat, chemical, or mechanical demands | Higher cost; tighter processing control |
| Thermoplastic elastomers | TPE, TPU | Soft-touch grips, seals, flexible features | Processes like a thermoplastic, flexes like rubber |
| Liquid silicone rubber | LSR | Seals, gaskets, medical-grade flexible parts | Different mold, cure, and release behavior |
Colorants and additives (UV stabilizers, flame retardants, glass or mineral fill) can change how a resin flows, shrinks, and finishes, so we factor them into material selection early rather than after tooling is built.
Surface Finishes for Molded Parts
The mold’s surface finish transfers directly onto the part, so finish selection affects appearance, draft requirements, and even mold release.
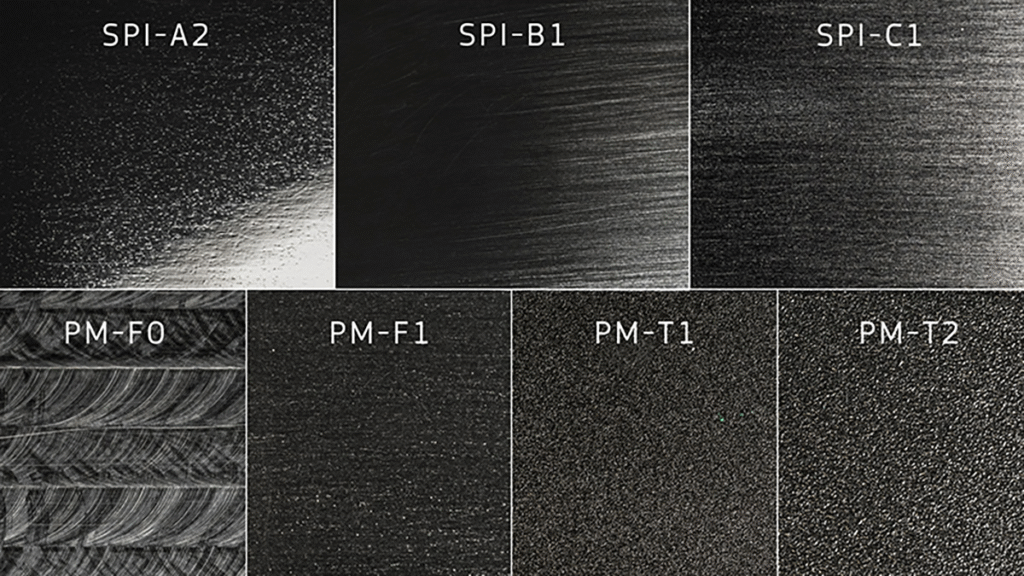
| Finish Category | Typical Grades | الأفضل لـ |
| Non-cosmetic | Standard tool finish | Internal or hidden parts where appearance doesn’t matter |
| Low-cosmetic | Light polish | Functional prototypes, less visible surfaces |
| Polished | SPI-grade (A-series) | Clear, glossy, or high-end cosmetic surfaces |
| Textured / bead-blasted | PM-T grades | Matte look, hides minor cosmetic marks; needs extra draft |
| Custom texture | Pebbled, grained, leather-like | Branded consumer products, ergonomic grips |
Tolerances and Precision
Because resin shrinks as it cools, no molded part comes out exactly the size of the mold cavity — and different resins shrink by different amounts (stable resins like ABS and polycarbonate hold tighter, more predictable tolerances than less stable resins like unfilled TPE). Tolerance also depends on part geometry, wall thickness consistency, and how well the mold itself was machined.
Our general guidance: hold standard commercial tolerances wherever the part’s function allows it, and reserve tight or precision tolerances for the specific features that truly require them — a locating boss, a snap-fit engagement, a sealing surface — rather than applying tight tolerances across the whole part. This keeps tooling and inspection cost proportional to what the design actually needs. On request, we’ll review a drawing’s callouts against the chosen material’s known shrink behavior before quoting, so tolerances that look fine on paper don’t turn into a rework loop after the first shot.
Post-Processing and Secondary Operations
Many parts need work after they leave the mold. Elite Mold Tech’s value-added solutions cover:
- Ultrasonic welding — fusing molded parts together or setting inserts using heat and vibration
- Pad printing and laser engraving — adding logos, instructions, or identification to a finished part
- Assembly — combining molded components into finished sub-assemblies
- طباعة الشاشة الحريرية
- Painting and surface treatment
- Chrome coating
Planning these steps alongside the mold design — rather than as an afterthought — usually avoids costly redesign later.
Quality Control and Certifications
Injection molding quality depends on part design, mold design, material selection, process control, and inspection working together — and at production volume, “quality” means consistency across thousands or millions of units, not just a good first sample.
| Quality Step | What It Confirms |
| First Article Inspection (FAI) | Initial parts match the drawing dimensionally |
| In-process checks | The process stays within spec through the run |
| CMM inspection | Critical dimensions are measured accurately |
| CTQ (Critical-to-Quality) inspection | Function-critical features are checked consistently |
| Final inspection + photo documentation | Parts are verified before shipment |
| Material and process documentation | Parts meet project, regulatory, or supply-chain requirements |
Elite Mold Tech’s production is backed by ISO 9001 quality management.
Injection Molding Cost Factors
Injection molding cost breaks into two buckets: tooling cost (a one-time investment to build the mold) and per-part cost (what each shot costs to produce once the mold exists). The main drivers:
- Tool complexity — cavity count, side-actions, lifters, and surface finish all add machining time and cost to the mold itself.
- Part size and material volume — larger parts and thicker walls use more resin and take longer to cool per cycle.
- Material choice — commodity resins cost less than engineering or high-performance resins, both per kilogram and often in cycle time.
- Cavitation — a single-cavity tool costs less upfront but produces one part per cycle; a multi-cavity tool costs more to build but lowers cost per part at volume.
- Tolerances and finish — tighter tolerances and cosmetic finishes add inspection time and tooling precision requirements.
- Order volume — the same tooling investment spread across a larger production run lowers the effective cost per part.
Because tooling is the dominant upfront cost, the biggest lever for reducing total project cost is usually design simplification — removing unnecessary side-actions, standardizing wall thickness, and right-sizing tolerances — before the mold is quoted, not after.
Injection Molding Glossary
- Boss — A raised feature used for fasteners, inserts, pins, or alignment.
- Cavity — The space inside a closed mold that shapes the part.
- Core out — Removing unnecessary material from a thick section while preserving the part’s function.
- Draft — A slight angle added to vertical walls so the part releases cleanly from the mold.
- Ejector pins — Pins that push the finished part out of the mold after cooling.
- Gate — The opening where molten resin enters the mold cavity.
- Gusset — A support feature that reinforces walls, bosses, or other raised geometry.
- Parting line — The line where the two halves of the mold meet.
- Pickout — A removable mold insert used to form features that can’t release automatically.
- Rib — A thin support feature that adds strength or stiffness without thickening the whole wall.
- Runner — The channel that carries resin from the injection point to the gate.
- Shutoff — Where two mold surfaces meet to form a feature, often used to simplify or avoid a side-action.
- Side-action — A moving mold component that forms or releases a feature not aligned with the mold’s opening direction.
- Sink mark — A small surface depression caused by uneven cooling or thick material sections.
- Undercut — A feature that prevents the part from being pulled straight out of the mold.
- Weld line — A visible or structural seam where two resin flow fronts meet inside the mold.
الأسئلة الشائعة
What is injection molding used for?
It’s used to mass-produce plastic parts with consistent dimensions and finish — from small consumer product components to structural automotive and medical parts — anywhere a high volume of identical parts is needed.
How much does injection molding cost?
Cost has two parts: a one-time tooling cost to build the mold, and a per-part cost for each shot. Tooling cost depends on part complexity, size, and cavitation; per-part cost drops as order volume increases.
What plastics are used in injection molding?
Common choices include commodity resins like PP, PE, and PS; engineering resins like ABS, polycarbonate, and nylon; high-performance resins like PEEK; and elastomers like TPE, TPU, and LSR for flexible parts.
What causes warping in molded parts?
Warping is usually caused by uneven wall thickness, unbalanced mold cooling, or a resin with high or inconsistent shrinkage.
How much draft does a molded part need?
A common starting point is 1-2 degrees on smooth vertical walls, with more draft added for textured surfaces or deeper features.
What tolerances can injection molding hold?
It depends on material and geometry — stable resins like ABS and polycarbonate hold tighter tolerances than less stable resins. We recommend tight tolerances only on features that need them.
What’s the difference between overmolding and insert molding?
Insert molding embeds a separate component — often metal — into the plastic part for strength, conductivity, or thread integrity. Overmolding combines two plastic or elastomeric materials, typically for grip, cushioning, or sealing.
What’s the minimum order quantity for injection molding?
It varies by project. Because tooling is a fixed upfront cost, very small orders carry a higher effective per-part cost; we can advise on the volume where tooling investment starts to pay off.
Injection molding vs. 3D printing — which should I use?
3D printing is generally better for one-off or very low-volume parts and rapid design iteration, since it needs no tooling. Injection molding requires a mold upfront but becomes far more cost-effective as volume increases.
Ready to Start Your Injection Molding Project?
Upload your CAD files and our engineering team will review manufacturability and respond within 12 hours with a quote and DFM feedback.
Get an Instant Quote → elitemoldtech.com
Elite Mold Tech is an ISO 9001-certified precision manufacturer based in Shenzhen, China, serving customers worldwide from prototype through production.
Ready to Start Your Injection Molding Project?
Send us your CAD files for a free DFM analysis and detailed quotation — typically within 48 hours.
Get a Quote →
📧 البريد الإلكتروني: sales@elite-technology.cn | 📞 Phone: 0086-0769-23092639
🏭 العنوان: Shenzhen, Guangdong, China