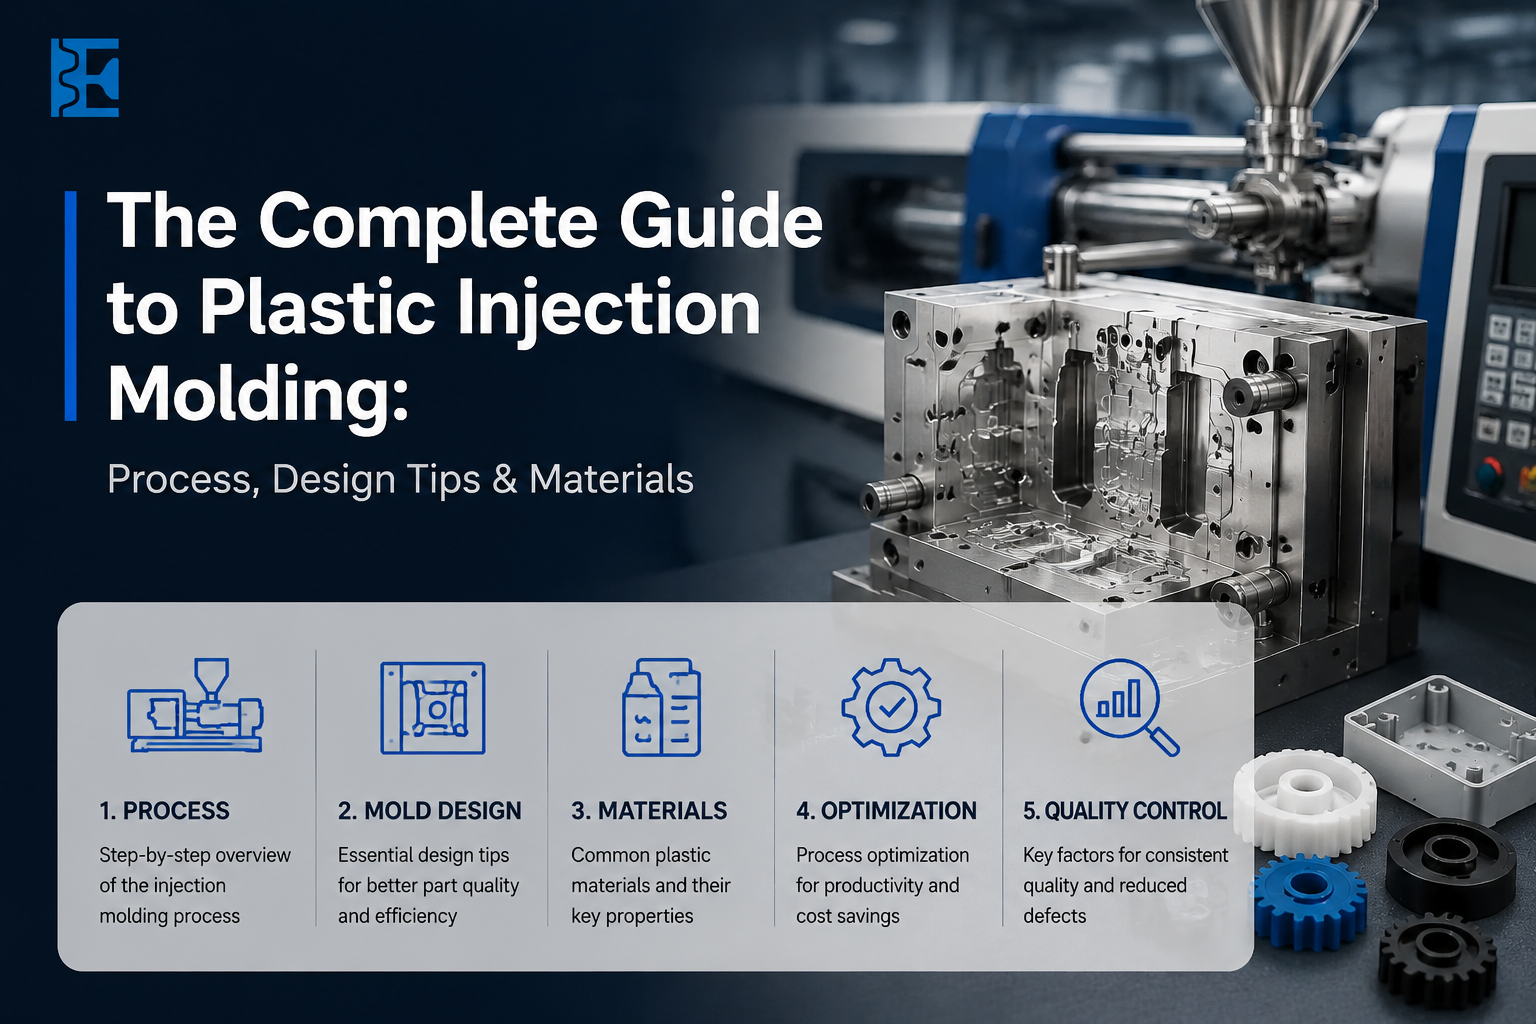
A moldagem por injeção é o processo por trás da maioria das peças plásticas com as quais você entra em contato diariamente — caixas de telefones, clipes automotivos, invólucros de dispositivos médicos, coberturas para robótica. Ela domina a fabricação de plásticos em grande volume, pois um único molde pode reproduzir a mesma peça milhares ou milhões de vezes com precisão rigorosa e repetível.
A Shenzhen Elite Technology Co., Ltd (Elite Mold Tech) vem atuando há mais de 20 anos na fabricação de moldes de injeção e na moldagem de peças plásticas para clientes nos setores aeroespacial, automotivo, de dispositivos médicos, robótica, eletrônicos de consumo e equipamentos industriais. Este guia aborda o que é o processo, como ele funciona, como projetar uma peça que seja moldada corretamente logo na primeira tentativa, quais materiais e acabamentos escolher, quais são os erros mais comuns e quais são os custos — a mesma lista de verificação que nossos engenheiros utilizam em cada orçamento.
O que há neste guia
- O que é a moldagem por injeção de plástico?
- Como funciona o processo de moldagem por injeção?
- Tipos de moldagem por injeção
- Diretrizes de projeto para peças moldadas por injeção
- Projeto de recursos complexos
- Defeitos comuns e como corrigi-los
- Materiais para moldagem por injeção
- Acabamentos de superfície
- Tolerâncias e precisão
- Pós-processamento e operações secundárias
- Controle de Qualidade e Certificações
- Fatores que influenciam o custo da moldagem por injeção
- Glossário
- Perguntas frequentes
O que é a moldagem por injeção de plástico?
A moldagem por injeção de plástico é um processo de fabricação no qual a resina plástica é derretida, injetada sob pressão em uma cavidade de molde de aço ou alumínio usinada com precisão, resfriada até se solidificar e, em seguida, ejetada como uma peça acabada. Como o molde define a geometria exata da peça, cada ciclo produz um resultado praticamente idêntico — e é por isso que o processo é a escolha padrão para a produção em massa de peças plásticas.
A desvantagem é o investimento inicial: é preciso projetar e usinar um molde antes mesmo que exista uma única peça, de modo que o custo das ferramentas e o prazo de entrega vêm em primeiro lugar. No entanto, uma vez que o molde está pronto, o custo de cada peça adicional cai drasticamente. É por isso que a moldagem por injeção é mais adequada para séries de produção, ferramentas de transição entre a fase de protótipo e a fabricação em grande escala, e componentes plásticos para uso final — em vez de peças únicas, que geralmente se adaptam melhor à usinagem CNC ou à impressão 3D.
Na Elite Mold Tech, oferecemos suporte a toda a gama de serviços: amostras moldadas em protótipo para validação do projeto, ferramentas de transição para a fase inicial de produção e moldes de produção com múltiplas cavidades para pedidos de grande volume.
Como funciona o processo de moldagem por injeção?
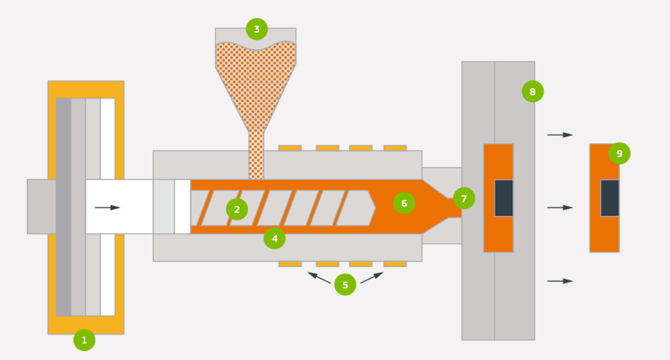
Uma máquina de moldagem por injeção possui três componentes principais: uma tremonha que alimenta os grânulos de plástico bruto, um cilindro aquecido com um parafuso rotativo que derrete e empurra a resina para frente, e o molde — fixado em uma unidade de fixação — que molda e resfria a peça.
Cada ciclo de produção segue a mesma sequência:
- Braçadeira — as duas metades do molde se fecham e travam sob pressão.
- Injetar — A resina fundida é injetada na cavidade do molde por meio do sistema de porta e canal de injeção.
- Embale e segure — é aplicada uma pressão adicional por um breve período para compensar o encolhimento do material à medida que ele começa a esfriar.
- Legal — a peça se solidifica dentro da cavidade; os canais de resfriamento do molde dissipam o calor de maneira uniforme.
- Ejetar — O molde se abre e os pinos ejetores empurram a peça pronta para fora.
Um único ciclo pode durar de alguns segundos a cerca de um minuto, dependendo do tamanho da peça, da espessura da parede e do material — e se repete continuamente durante toda a duração da ordem de produção. Como grande parte da precisão e da qualidade estética da peça final depende do grau de controle desse ciclo, tratamos os parâmetros do processo (velocidade de injeção, pressão, tempo de resfriamento, temperatura do molde) como parte da engenharia, e não como algo secundário — documentando-os para que cada lote de produção reproduza o mesmo resultado da primeira amostra aprovada.
Tipos de moldagem por injeção
Peças diferentes exigem abordagens de moldagem diferentes. Veja como adaptamos o processo ao projeto:
| Processo | Melhor para | Considerações-chave de projeto |
| Moldagem por injeção de plástico | Peças termoplásticas padrão, desde a fase de protótipo até a produção em série | Seleção do material, espessura da parede e a moldabilidade determinada pelo ângulo de desmoldagem |
| Moldagem de protótipos | Lotes de baixo volume para validação do projeto antes da produção em série | Ferramentas mais rápidas e de menor custo; resfriamento frequentemente simplificado |
| Moldagem de produção | Pedidos de maior volume | As matrizes com múltiplas cavidades e a otimização do tempo de ciclo reduzem o custo por peça |
| Moldagem por injeção de giro rápido | Projetos com prazos apertados | Fluxo de trabalho otimizado para a fabricação de ferramentas, a fim de reduzir o tempo de produção |
| Sobremoldagem | Substrato rígido + camada de toque suave ou de vedação | Compatibilidade de aderência entre o substrato e a resina de sobremoldagem |
| Moldagem por inserção | Peças que requerem roscas metálicas embutidas, pinos ou contatos | Posicionamento e retenção do inserto fixados antes da montagem das ferramentas |
| Micro Moldagem | Componentes pequenos e de alta precisão | Tolerâncias rigorosas, ferramentas miniaturizadas especializadas |
| Moldagem de LSR | Vedações, juntas, componentes médicos flexíveis | Com comportamento diferente em termos de fluidez, cura e desmoldagem em comparação com os termoplásticos |
| Moldagem em família / com múltiplas cavidades | Várias peças ou várias cópias em uma única ferramenta | Equilíbrio entre o fluxo e o resfriamento nas cavidades |
Diretrizes de projeto para peças moldadas por injeção
A maioria dos excedentes de custo e problemas de qualidade na moldagem por injeção tem origem em decisões tomadas antes mesmo de o molde ser fabricado. Essas são as verificações que nossa equipe realiza em cada revisão de projeto.
- Espessura da parede — Mantenha as paredes o mais uniformes possível. Espessuras irregulares esfriam em ritmos diferentes, o que é a principal causa de marcas de afundamento, empenamento e vazios. Nos pontos em que for necessário alterar a espessura, faça uma transição gradual, em vez de uma mudança abrupta.
- Ângulo de calado — As paredes verticais precisam de um leve ângulo de inclinação — geralmente começando em torno de 1 a 2 graus — para que a peça se solte facilmente do molde, sem arrastar ou riscar. Superfícies texturizadas precisam de um ângulo de inclinação maior do que as polidas para se soltarem corretamente.
- Reforços e reforços angulares — As nervuras conferem rigidez sem o risco de afundamento que decorre do aumento da espessura de toda a parede. Como orientação geral, mantenha a espessura das nervuras em torno de 50-60% da parede adjacente para evitar uma marca visível de afundamento na face oposta.
- Chefes — Os ressaltos devem ser esvaziados (ocos), em vez de moldados como peças maciças. Um ressalto maciço quase sempre deixa uma marca de afundamento na superfície finalizada.
- Localização do portão — O local por onde a resina entra na cavidade afeta o padrão de preenchimento, a localização da linha de solda e a posição da pequena marca da entrada de material na peça acabada. Mudar a posição da entrada de material depois que o molde já foi usinado é caro.
- Cantos e filetes — Cantos internos agudos concentram a tensão e podem rachar sob carga. Arredondar os cantos internos com um filete melhora tanto a moldabilidade quanto a resistência da peça.
- Cortes por baixo e ejeção — Peças que não podem ser retiradas diretamente na direção de abertura do molde requerem uma ação lateral, um elevador ou uma alteração no projeto.
- Tolerâncias realistas — A resina encolhe à medida que esfria, e diferentes resinas apresentam graus distintos de encolhimento. Recomendamos tolerâncias estreitas apenas nos casos em que a função da peça realmente as exija.
Para peças complexas ou com requisitos estéticos rigorosos, nossos engenheiros podem realizar uma análise de fluxo no molde antes do corte do aço, o que permite identificar problemas de preenchimento de superfícies, linhas de solda e resfriamento enquanto ainda é mais econômico corrigi-los no projeto.
Projeto de recursos complexos
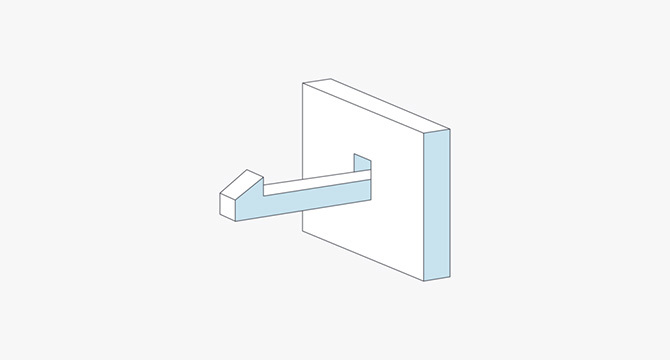
Encaixes de pressão e clipes
Os encaixes por pressão reduzem a necessidade de parafusos e acessórios secundários, mas impõem tensões de flexão repetidas ao projeto; por isso, a escolha do material é importante — uma resina flexível tolera um encaixe por pressão muito melhor do que uma rígida ou frágil. Dependendo da geometria, o molde pode precisar de uma ação lateral ou de um elevador para liberar o encaixe de forma limpa.
Dobradiças flexíveis
Uma dobradiça flexível é uma tira fina e flexível de plástico que conecta duas seções moldadas, permitindo que elas se dobrem repetidamente sem quebrar. O polipropileno é o material mais comumente utilizado devido à sua resistência à fadiga. A seção da dobradiça deve ser fina, uniforme e sem transições abruptas.
Chefes e impasses
Além de manter os perfis centrais dos vigas, reforce-os com nervuras ou reforços nos pontos onde for necessária maior resistência e mantenha a espessura da parede circundante uniforme para minimizar afundamentos e vazios.
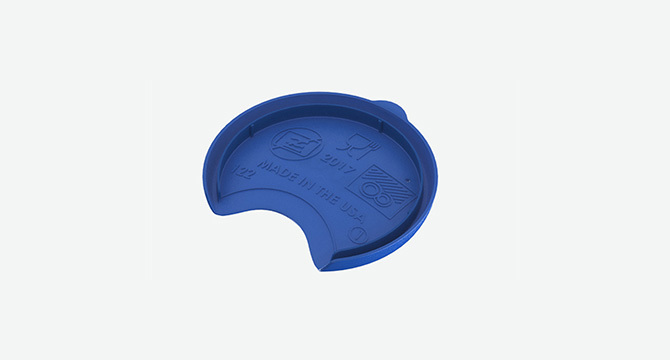
Texto e logotipos moldados
O texto moldado diretamente na peça precisa ter tamanho suficiente para ser usinado na matriz e se soltar sem danos. Fontes sans-serif simples são mais fáceis de usinar do que as decorativas. Como ponto de partida, mantenha o texto com pelo menos 20 pt, com a largura do traço e a profundidade dimensionadas de acordo com o material e o acabamento da peça.
O que é overmolding?
No processo de sobremoldagem, a produção das peças de substrato é um processo padrão de moldagem por injeção que envolve um molde de alumínio sem canais de aquecimento ou resfriamento. Os tempos de ciclo são um pouco mais longos, o que permite que nossos moldadores monitorem a pressão de enchimento, aspectos estéticos e a qualidade básica das peças. Quando toda a série de peças de substrato é moldada, o conjunto de ferramentas de sobremoldagem é então montado na prensa. As peças de substrato são colocadas manualmente no molde, onde cada uma é sobremoldada com um material termoplástico ou borracha de silicone líquida.
Moldagem por sobremoldagem e moldagem por inserção
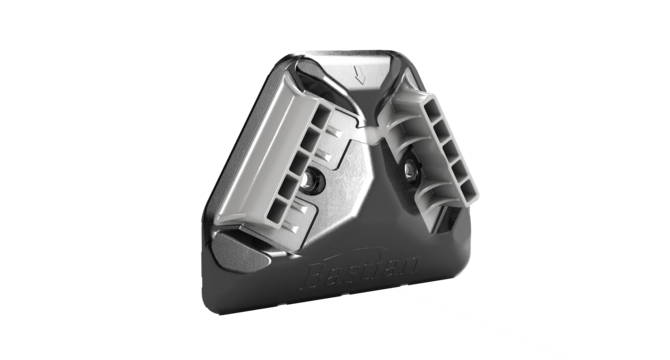
A combinação de materiais ou a incorporação de componentes agrega funcionalidade, mas depende da compatibilidade — seja a aderência entre o substrato e a resina de sobremoldagem, seja a retenção segura de uma peça inserida sob a pressão de moldagem.
Defeitos comuns na moldagem por injeção e como corrigi-los
| Defeito | Como é | Causa Comum de Projeto | Correção de projeto ou de processo |
| Marcas de afundamento | Depressões rasas na superfície | Paredes grossas, saliências sólidas, nervuras robustas | Remover o excesso de material; redesenhar as nervuras de acordo com a espessura especificada |
| Deformação | Parte torcida, curvada ou irregular | Espessura irregular da parede, resfriamento desequilibrado | Paredes uniformes; disposição equilibrada dos canais de resfriamento |
| Vazios | Bolhas de ar presas no interior da peça | Seções espessas que esfriam lentamente | Reduzir a espessura da seção; ajustar a pressão do pacote |
| Flash | Reduzir o excesso de plástico na linha de divisão | Válvulas de fechamento do molde desgastadas ou desalinhadas | Manutenção de ferramentas; projeto de fechamento mais hermético |
| Tiros curtos | Obturação incompleta da cavidade | Paredes finas, percursos de fluxo longos, sistema de alimentação inadequado | Ajuste a localização da porta; reavalie a espessura da parede |
| Linhas de solda | Costura visível ou pouco acentuada no ponto de encontro das frentes de fluxo | Várias portas, contornar obstáculos | Reposicionar as comportas; ajustar os parâmetros do processo |
| Jateamento | Marcas onduladas na superfície, semelhantes a vermes | A resina está entrando muito rápido no espaço aberto | Ajuste a posição da porta ou a velocidade de injeção |
| Marcas de queimadura | Manchas escuras ou carbonizadas, geralmente próximas a portões | Ar retido, calor de cisalhamento em excesso | Melhorar a ventilação; ajustar a velocidade de injeção |
Identificar esses problemas no papel — ou em uma simulação de fluxo de moldagem — é sempre mais barato do que detectá-los depois que o aço já tiver sido cortado; é por isso que a revisão do projeto ocorre antes de apresentarmos o orçamento para as ferramentas.
Materiais para moldagem por injeção
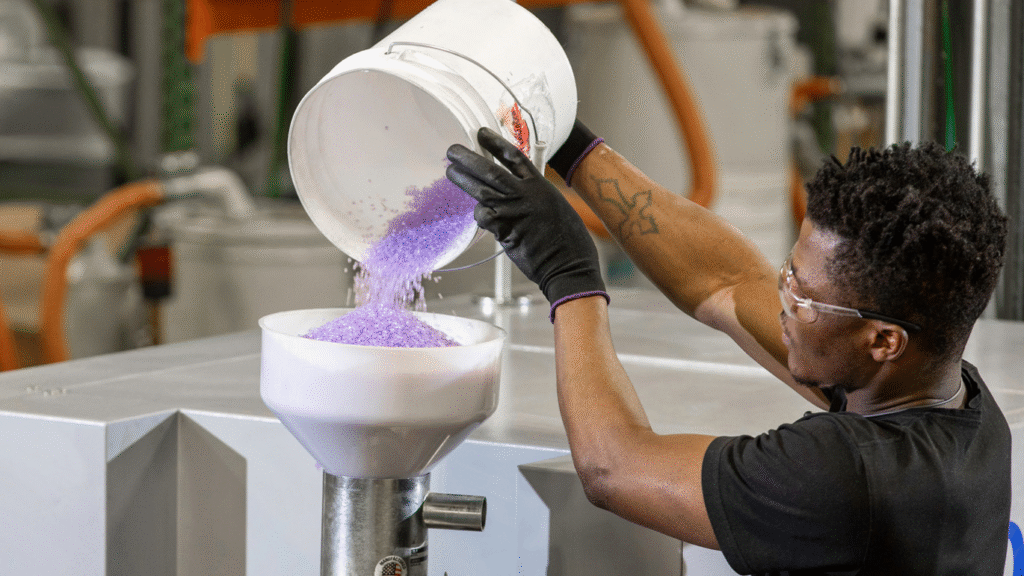
A escolha do material depende da função que a peça deve desempenhar durante o uso: qual a carga que ela suporta, a que temperatura ou exposição química está sujeita, se precisa ser flexível e qual deve ser sua aparência.
| Família de resinas | Exemplos comuns | Uso típico | Notas de projeto |
| Termoplásticos comuns | PP, PE, PS | Caixas e recipientes com preço acessível | Custo mais baixo; desempenho moderado |
| Termoplásticos de engenharia | ABS, PC, Nylon, POM, PBT | Carcaças funcionais, engrenagens, grampos, peças estruturais | Maior resistência, rigidez e resistência ao calor |
| Termoplásticos de alto desempenho | PEEK, PEI, PPS | Altas exigências térmicas, químicas ou mecânicas | Custo mais elevado; controle mais rigoroso do processamento |
| Elastômeros termoplásticos | TPE, TPU | Pegas com toque macio, vedações, recursos flexíveis | Tem o comportamento de um termoplástico e a flexibilidade da borracha |
| Borracha de silicone líquida | LSR | Vedações, juntas e peças flexíveis de grau médico | Comportamentos diferentes em relação ao molde, à cura e à desmoldagem |
Corantes e aditivos (estabilizadores UV, retardantes de chamas, enchimentos de vidro ou minerais) podem alterar a forma como uma resina flui, encolhe e apresenta acabamento; por isso, levamos esses fatores em consideração na seleção do material desde o início, em vez de só depois que o molde for fabricado.
Acabamentos de superfície para peças moldadas
O acabamento da superfície do molde é transferido diretamente para a peça; portanto, a escolha do acabamento afeta a aparência, os requisitos de inclinação e até mesmo a desmoldagem.
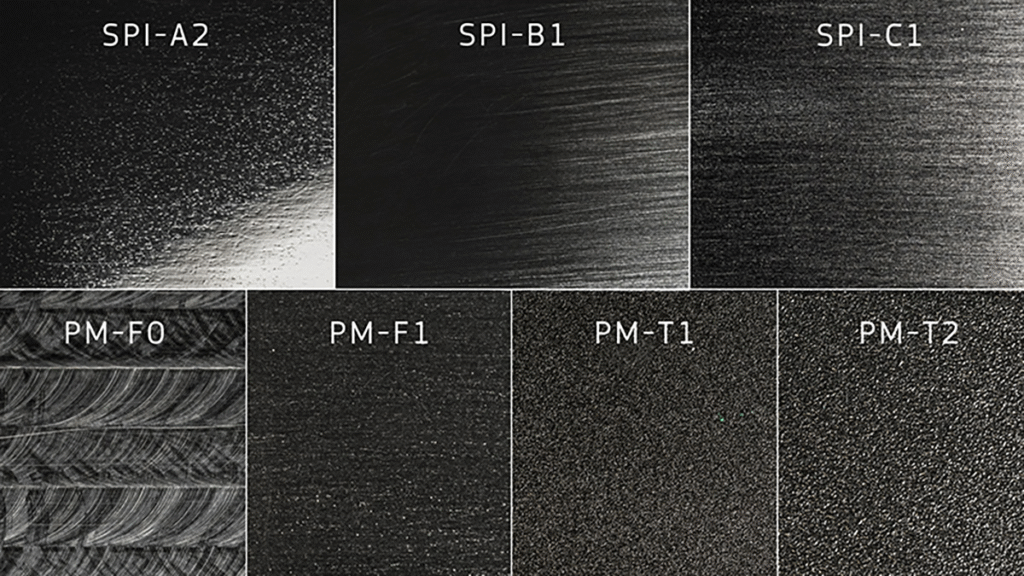
| Categoria de chegada | Notas típicas | Melhor para |
| Não cosmético | Acabamento padrão da ferramenta | Peças internas ou ocultas, nas quais a aparência não importa |
| De baixo impacto estético | Polimento leve | Protótipos funcionais, superfícies menos visíveis |
| Polido | Grau SPI (série A) | Superfícies transparentes, brilhantes ou com acabamento cosmético de alta qualidade |
| Texturizado / jateado com esferas | Notas do PM-T | Aspecto fosco, disfarça pequenas imperfeições estéticas; requer ventilação adicional |
| Textura personalizada | Textura granulada, com relevo, semelhante a couro | Produtos de consumo de marca, punhos ergonômicos |
Tolerâncias e precisão
Como a resina encolhe ao esfriar, nenhuma peça moldada sai exatamente do tamanho da cavidade do molde — e resinas diferentes apresentam graus distintos de encolhimento (resinas estáveis, como ABS e policarbonato, mantêm tolerâncias mais restritas e previsíveis do que resinas menos estáveis, como o TPE sem enchimento). A tolerância também depende da geometria da peça, da consistência da espessura da parede e da qualidade do usinagem do próprio molde.
Nossa orientação geral: mantenha tolerâncias comerciais padrão sempre que a função da peça permitir e reserve tolerâncias estreitas ou de precisão para as características específicas que realmente as exigem — um ressalto de posicionamento, um encaixe por pressão, uma superfície de vedação — em vez de aplicar tolerâncias estreitas em toda a peça. Isso mantém os custos de ferramentas e inspeção proporcionais ao que o projeto realmente exige. Mediante solicitação, analisaremos as especificações do desenho em relação ao comportamento conhecido de retração do material escolhido antes de apresentar o orçamento, para que tolerâncias que parecem adequadas no papel não se transformem em um ciclo de retrabalho após a primeira injeção.
Pós-processamento e operações secundárias
Muitas peças precisam de acabamento depois de saírem do molde. As soluções de valor agregado da Elite Mold Tech abrangem:
- Soldagem ultrassônica — unir peças moldadas ou fixar inserções por meio de calor e vibração
- Tampografia e gravação a laser — adicionar logotipos, instruções ou identificação a uma peça acabada
- Montagem — combinação de componentes moldados em subconjuntos acabados
- Impressão em tela de seda
- Pintura e tratamento de superfícies
- Revestimento de cromo
Planejar essas etapas em paralelo ao projeto do molde — em vez de deixá-las para depois — geralmente evita um reprojeto dispendioso mais adiante.
Controle de Qualidade e Certificações
A qualidade da moldagem por injeção depende da combinação entre o projeto da peça, o projeto do molde, a seleção do material, o controle do processo e a inspeção — e, em volumes de produção, “qualidade” significa consistência em milhares ou milhões de unidades, não apenas uma boa primeira amostra.
| Etapa de Qualidade | O que isso confirma |
| Inspeção do Primeiro Artigo (FAI) | As peças iniciais correspondem dimensionalmente ao desenho |
| Verificações durante o processo | O processo permanece dentro das especificações durante toda a produção |
| Inspeção por CMM | As dimensões críticas são medidas com precisão |
| Inspeção CTQ (Critical-to-Quality) | Os recursos essenciais ao funcionamento são verificados de forma consistente |
| Inspeção final + documentação fotográfica | As peças são verificadas antes do envio |
| Documentação de materiais e processos | As peças atendem aos requisitos do projeto, regulatórios ou da cadeia de suprimentos |
A produção da Elite Mold Tech é certificada pela norma ISO 9001 de gestão da qualidade.
Fatores que influenciam o custo da moldagem por injeção
O custo da moldagem por injeção divide-se em duas categorias: custo de ferramentas (um investimento único para construir o molde) e custo por peça (o que custa produzir cada peça, uma vez que o molde já está pronto). Os principais fatores são:
- Complexidade da ferramenta — O número de cavidades, as ações laterais, os elevadores e o acabamento da superfície aumentam o tempo de usinagem e o custo do próprio molde.
- Dimensões da peça e volume do material — Peças maiores e paredes mais espessas consomem mais resina e demoram mais para esfriar a cada ciclo.
- Escolha do material — As resinas comuns custam menos do que as resinas de engenharia ou de alto desempenho, tanto por quilograma quanto, muitas vezes, em termos de tempo de ciclo.
- Cavitação — Uma matriz de cavidade única tem um custo inicial menor, mas produz uma peça por ciclo; uma matriz de múltiplas cavidades tem um custo de fabricação mais alto, mas reduz o custo por peça na produção em série.
- Tolerâncias e acabamento — Tolerâncias mais restritas e acabamentos estéticos aumentam o tempo de inspeção e os requisitos de precisão das ferramentas.
- Volume de pedidos — O mesmo investimento em ferramentas, distribuído por uma série de produção maior, reduz o custo efetivo por peça.
Como as ferramentas representam o principal custo inicial, a principal estratégia para reduzir o custo total do projeto geralmente é a simplificação do projeto — eliminando ações secundárias desnecessárias, padronizando a espessura das paredes e ajustando as tolerâncias — antes da cotação do molde, e não depois.
Glossário de moldagem por injeção
- Chefe — Uma saliência utilizada para fixadores, insertos, pinos ou alinhamento.
- Cavidade — O espaço dentro de um molde fechado que dá forma à peça.
- Retirar o miolo — Remover material desnecessário de uma seção espessa, preservando a função da peça.
- Rascunho — Um leve ângulo adicionado às paredes verticais para que a peça se solte facilmente do molde.
- Pinos ejetores — Pinos que empurram a peça pronta para fora do molde após o resfriamento.
- Portão — A abertura por onde a resina fundida entra na cavidade do molde.
- Reforço — Um recurso de suporte que reforça paredes, saliências ou outras partes salientes da geometria.
- Linha de separação — A linha onde as duas metades do molde se unem.
- Destaque — Um inserto removível do molde utilizado para moldar detalhes que não podem ser desmoldados automaticamente.
- Costela — Um elemento de reforço fino que confere resistência ou rigidez sem aumentar a espessura de toda a parede.
- Corredor — O canal que conduz a resina do ponto de injeção até a porta.
- Desligamento — Ponto em que duas superfícies do molde se encontram para formar um detalhe, frequentemente utilizado para simplificar ou evitar uma ação lateral.
- Ação lateral — Um componente móvel do molde que molda ou libera uma peça que não está alinhada com a direção de abertura do molde.
- Marca de afundamento — Uma pequena depressão na superfície causada por resfriamento irregular ou seções espessas do material.
- Undercut — Um recurso que impede que a peça seja retirada diretamente do molde.
- Linha de solda — Uma junção visível ou estrutural onde duas frentes de fluxo de resina se encontram dentro do molde.
Perguntas frequentes
Para que serve a moldagem por injeção?
É utilizado para a produção em massa de peças plásticas com dimensões e acabamento uniformes — desde pequenos componentes de produtos de consumo até peças estruturais automotivas e médicas — em qualquer lugar onde seja necessário um grande volume de peças idênticas.
Quanto custa a moldagem por injeção?
O custo é composto por duas partes: um custo único de ferramentas para a fabricação do molde e um custo por peça para cada injeção. O custo das ferramentas depende da complexidade, do tamanho e do número de cavidades da peça; o custo por peça diminui à medida que o volume do pedido aumenta.
Quais plásticos são utilizados na moldagem por injeção?
As opções mais comuns incluem resinas comuns, como PP, PE e PS; resinas de engenharia, como ABS, policarbonato e náilon; resinas de alto desempenho, como PEEK; e elastômeros, como TPE, TPU e LSR, para peças flexíveis.
O que causa a deformação em peças moldadas?
A deformação é geralmente causada por espessura irregular das paredes, resfriamento desequilibrado do molde ou por uma resina com retração elevada ou inconsistente.
Qual é a profundidade de rebaixo necessária para uma peça moldada?
Um ponto de partida comum é de 1 a 2 graus em paredes verticais lisas, com um ângulo maior para superfícies texturizadas ou relevos mais profundos.
Quais tolerâncias a moldagem por injeção pode atingir?
Isso depende do material e da geometria — resinas estáveis, como ABS e policarbonato, permitem tolerâncias mais restritas do que resinas menos estáveis. Recomendamos tolerâncias restritas apenas para detalhes que realmente as exijam.
Qual é a diferença entre moldagem por sobremoldagem e moldagem por inserção?
A moldagem por inserção incorpora um componente separado — geralmente de metal — na peça plástica para proporcionar resistência, condutividade ou integridade da rosca. A sobremoldagem combina dois materiais plásticos ou elastoméricos, normalmente para proporcionar aderência, amortecimento ou vedação.
Qual é a quantidade mínima de pedido para moldagem por injeção?
Isso varia de acordo com o projeto. Como o custo das matrizes é um custo inicial fixo, pedidos muito pequenos apresentam um custo efetivo por peça mais alto; podemos orientá-lo sobre o volume a partir do qual o investimento nas matrizes começa a se pagar.
Moldagem por injeção x impressão 3D — qual devo usar?
A impressão 3D é, em geral, mais adequada para peças únicas ou de volume muito baixo e para iterações rápidas de projeto, uma vez que não requer ferramentas de fabricação. A moldagem por injeção exige a criação de um molde inicial, mas se torna muito mais econômica à medida que o volume aumenta.
Pronto para dar início ao seu projeto de moldagem por injeção?
Envie seus arquivos CAD e nossa equipe de engenharia analisará a viabilidade de fabricação e responderá em até 12 horas com um orçamento e recomendações de DFM.
Obtenha um orçamento instantâneo → elitemoldtech.com
A Elite Mold Tech é uma fabricante de produtos de precisão com certificação ISO 9001, sediada em Shenzhen, na China, que atende clientes em todo o mundo, desde a fase de protótipo até a produção em série.
Pronto para dar início ao seu projeto de moldagem por injeção?
Envie-nos seus arquivos CAD para uma análise DFM gratuita e um orçamento detalhado — normalmente em até 48 horas.
Solicite um orçamento →
📧 E-mail: sales@elite-technology.cn | 📞 Telefone: 0086-0769-23092639
🏭 Endereço: Shenzhen, Guangdong, China