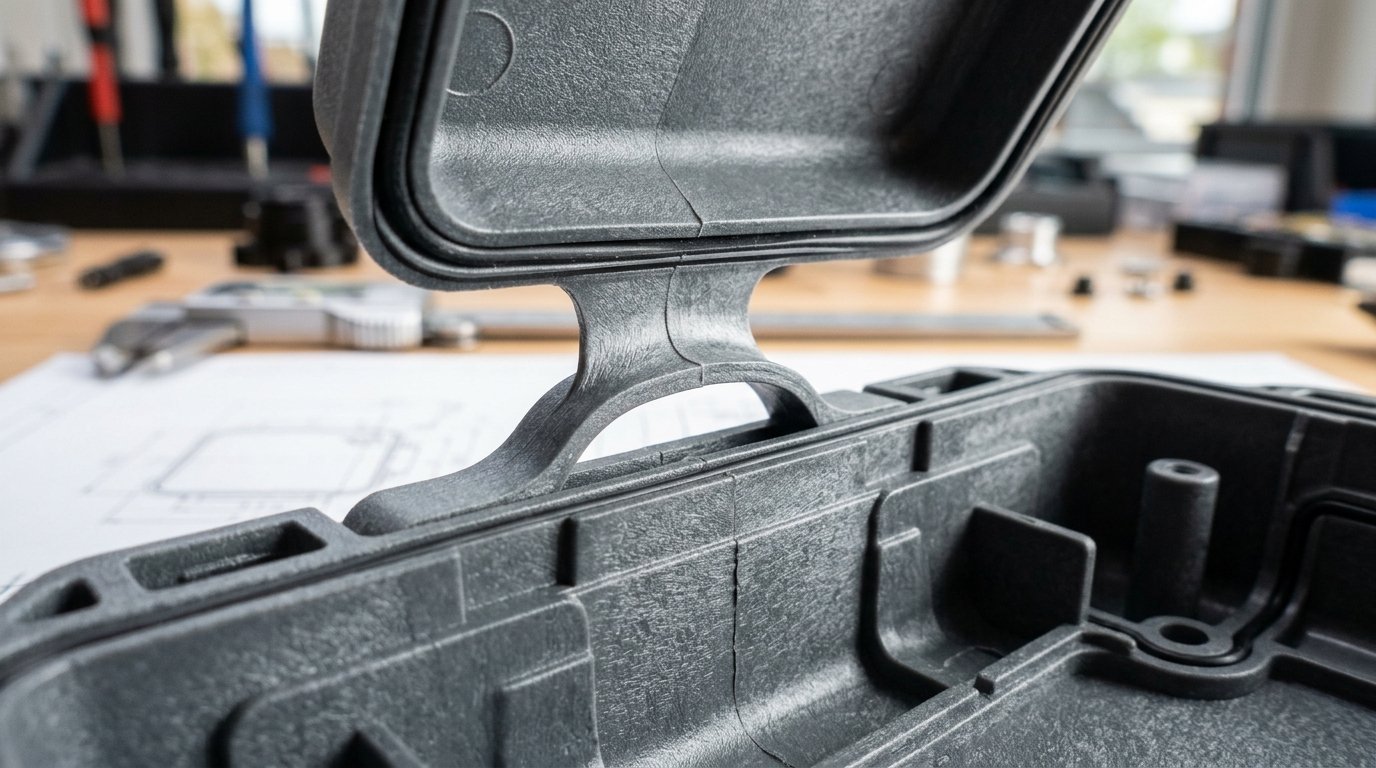
A living hinge costs nothing to add in CAD and a lot to fix once the mold is cut. Good living hinge design comes down to a polypropylene web about 0.2 to 0.38 mm thick, a short land, generous radii, a gate that pushes melt straight across the hinge, and a few flexes right after ejection. Miss one of those and the hinge cracks, delaminates or tears at the ends.
This guide covers materials, dimensions, gating, tooling, the first flex, failure causes, and what to specify when you ask for a quote.
What is an injection molded living hinge?
An injection molded living hinge is a thin, flexible web of plastic molded in one shot with the two rigid parts it joins. Melt flowing across the web lines up the polymer chains, and the first flexes stretch that web further. Properly designed polypropylene hinges have survived more than a million cycles.
That figure comes from LyondellBasell’s guide to polyolefin injection molding. Typical uses are flip-top closures, clamshell packaging, tool boxes, pill boxes and automotive clips.
Why polypropylene is the default hinge material
The hinge works because of orientation. On the first bends the thin web cold draws, with stretching ratios as high as 2 or 3 to 1 according to a technical note on living hinges hosted in MIT’s course 2.75 resources. A polypropylene living hinge takes that stretch without cracking, which is why PP dominates.
Grade matters:
- Homopolymer PP gives the best hinges, then random copolymer, then impact copolymer (LyondellBasell).
- Impact copolymer carries “some potential for delamination in the hinge area”, but the MIT-hosted note still recommends it where the part needs impact resistance in the cold.
- Lower melt flow rate (higher molecular weight) improves the hinge but makes the part harder to fill.
- Fillers hurt. Talc, mica and glass fiber can give very poor hinge life.
Polyethylene can also form a working hinge. The data below is for polypropylene, so ask your resin supplier for PE values. For ABS, nylon and other resins, see our injection molding material comparison.
Living hinge design dimensions for polypropylene
These living hinge dimensions come from LyondellBasell’s guide (page 32, Figure 41) and the MIT-hosted note. Treat them as starting points to confirm with your resin supplier and molder.
| Feature | Starting value | Source |
| Web thickness | 0.008-0.015 in (0.2-0.38 mm) | LyondellBasell |
| First cut in the tool (steel-safe) | 0.008-0.010 in (0.20-0.25 mm) | MIT-hosted note |
| Maximum for a true hinge | 0.015 in (0.38 mm) | MIT-hosted note |
| Land length | 0.060 in (1.5 mm) typical | MIT-hosted note |
| Radius into the web | 0.030 in (shown in Figure 41) | LyondellBasell |
| Closed-position relief | 0 to 0.005 in | LyondellBasell |
| Long hinges | Split into segments above 6 in | MIT-hosted note |
How thick should a living hinge be?
Start living hinge thickness at 0.008-0.010 in and open the steel up only if trials show a problem. The MIT-hosted note warns that webs below 0.008 in cause excessive pressure drop, shear heating, underpacked parts or short shots. LyondellBasell adds that the thicker end suits hinges that must carry load.
Some supplier guides quote living hinge thickness up to 0.5 mm. That is past what both primary sources allow for a true hinge. A thicker web can work where the hinge moves only a few degrees, but orientation and flex life drop.
Hinge land length, radii and relief
A land that is too short gives insufficient back pressure and uneven flow. One that is too long causes high pressure drop and underpacking. That is why the typical hinge land length sits near 0.060 in.
Sharp corners act as stress risers, so radius every transition into the web. Figure 41 also shows a shallow relief of up to 0.005 in, which stops material bunching when the lid is closed. Put it on the drawing, not just in the model.
Keep the hinge geometry straight
A hinge cannot form along a curved centerline. Where the lid or base is curved or deep, add shoulders so the hinge line stays straight; they also let the steel at the hinge be thicker, so the insert does not bow or break. Split hinges longer than 6 in into segments with small gaps, which the MIT-hosted note says improves hinge life and reduces tool flexing.
Where should the gate go on a hinged part?
Gate location decides more about hinge life than any other hinge design choice. LyondellBasell’s gating guidance for polypropylene integral hinges is to let melt flow through the whole hinge “with the flow front perpendicular to the hinge”, preferably with all gates on one side of it.
What goes wrong is easy to picture. A long, narrow box gated with one center drop sends melt into the hinge restriction before the cavity has filled. Flow stalls, the web starts to freeze, and the lid then fills from both ends. The result is a weld line running along the hinge, the worst place for it. The MIT-hosted note lists the fixes:
- Use several gates or a flash gate along the length.
- Split the hinge and gate opposite each segment.
- On two-hinge parts, gate the center section and make it 20 to 30 percent thicker than the adjacent walls.
- On shallow boxes, gate the heavier half beyond its centerline, away from the hinge.
- If walls under 0.040 in force you to gate both halves, move the knit line off the hinge with short-shot trials or sequential valve gates.
For gating in general, see our article on how gate location affects molded parts.
Tooling and processing details that decide hinge life
The web is the thinnest, hottest-running section in the tool. Cooling channels should run parallel and close to both sides of the hinge. Vents must stay clear, because a hinge wants a fast fill.
LyondellBasell’s window for optimum hinge properties:
- Melt temperature typically 500-525°F (260-275°C)
- Fast injection speed
- Warm mold at 120-150°F (50-65°C)
The MIT-hosted note adds that fill speed should have no step changes. Filling too slowly, or with melt that is too cold, causes flow hesitation and delamination.
Our position: cut the hinge thin and adjust after the first trial. Removing steel to thicken a web is quick. Adding steel back to thin one means welding or a new insert. The same logic applies to the wall thickness rules for plastic parts around the hinge.
Why flex the hinge right after ejection?
The first flexes cold draw the web while it is still warm, locking in orientation. Both primary documents recommend flexing several times immediately after molding. The MIT-hosted note describes a 4 melt flow rate homopolymer hinge that ran 300,000 flexes over 180 degrees at 75°F, 300,000 at -20°F, and 300,000 more at 75°F without failure.
Production does not always allow it. LyondellBasell notes that flexing is not possible in some applications, such as multi-cavity hinged closures, and that a properly designed hinge still performs adequately. Agree up front who does the first flex: an operator, a fixture on the conveyor, or nobody. If samples are flexed by hand at the press but production parts never are, the pilot run will not represent what ships.
Hinge ends, torque and tearing
Lids that snap or twist load the hinge ends first. The MIT-hosted note gives three fixes: thicken the ends from 0.010 to 0.020 in over 0.020-0.040 in, add a 0.005 in film at each end (reported to raise torque-to-failure tenfold), or radius the ends.
Common failures and their usual causes
| Symptom | Likely cause | Where to look |
| Crack along the hinge line | Weld line in the web | Gate layout |
| Layers peeling at the hinge | Flow hesitation, cold melt, impact copolymer | Fill speed, melt temperature, grade |
| Tear starting at one end | Twisting load on a plain web | End thickening or end film |
| Short or thin web | Web below 0.008 in, poor venting | Steel dimension, vents |
| Early fatigue | Filler, thick web, no post-mold flex | Grade, thickness, flex step |
Process adjustment can shrink some of these. It rarely fixes a weld line that the gate layout puts in the hinge.
When a molded hinge is the wrong choice
UV light and hot, wet environments attack the thin web first, and the MIT-hosted note says such parts need special stabilization and testing. A hinge also cannot carry much load.
For very large or complex parts, a coined hinge can be the better route. LyondellBasell describes pressing a heated steel die at about 425°F (220°C) into the molded part at 50-100 psi, reducing the web to 0.005-0.015 in.
Prototypes need care too. A printed or machined hinge will not tell you how a molded living hinge will last, because orientation comes from mold flow. Our 3D printed living hinge guide covers printed hinges for form and fit. For life testing, a prototype injection mold in the production resin is the better choice.
What to put on the drawing and in the RFQ
- Resin family, grade type (homopolymer, random or impact copolymer) and “no filler”
- Nominal web thickness, noting the tool should start thin and be opened up after trials
- Hinge geometry: land length, radii and closed-position relief as drawn dimensions
- Required flex cycles, temperature range, and UV or chemical exposure
- Whether post-mold flexing is required and who performs it
- First-article checks: section one sample through the hinge to measure the web, and run a flex test to your cycle count
Settle these before the mold is designed. Moving a gate after steel is cut means welding, re-machining and another round of samples.
Frequently asked questions
What material is best for a living hinge?
Polypropylene is the standard choice. LyondellBasell ranks homopolymer PP best, followed by random copolymer and then impact copolymer, which can delaminate at the hinge. Avoid talc, mica and glass fillers near the web. Polyethylene can also work, but confirm hinge suitability and dimensions with your resin supplier first.
How long does a living hinge last?
A well-made polypropylene living hinge can run for a very long time. LyondellBasell reports lifetimes above a million cycles, and a test in the MIT-hosted note ran 900,000 flexes across three temperatures without failure. Poor gating, fillers, UV exposure or a thick web can cut that life sharply.
Can you make a living hinge in ABS or nylon?
Parts in other resins can include a thin flexing web, but the published hinge dimensions in this article are for polypropylene. Life in ABS or nylon depends on the grade and the load. Ask the resin supplier for hinge data, then prove the design with molded samples before committing production tooling.
Can a living hinge be 3D printed for prototyping?
Yes, for checking fit, clearance and the opening angle. A printed hinge does not have the flow-driven orientation of a molded one, so its flex life says little about the production part. Use prints for geometry and a prototype mold in the production resin for life testing.
Is a living hinge cheaper than a mechanical hinge?
Usually, once volumes justify the mold. The hinge is molded with the part, so there are no pins, no second component and no assembly step. The trade-offs are a more demanding tool, careful gating, limited load capacity and a design that is expensive to change once steel is cut.
Getting living hinge design right before steel is cut
Most hinge failures are fixed before the first shot: grade, web thickness, land, radii and gate layout. When you design a living hinge for a new part, review those with your molder at the DFM stage, start the web thin, and agree who performs the first flex.
Elite Mold Tech offers plastic injection molding for hinged parts alongside prototype tooling, so one supplier can review the hinge design before the production mold is built. See the full range of services on the Elite Mold Tech homepage.